How to Download, Install, and Configure "IBM Lotus Notes"?
Properly installing and configuring IBM Lotus Notes on user's Windows machines is essential when working with Regzion's software tools for NSF-related tools such as NSF Converter, NSF Viewer, NSF Email Address Extractor, and others.
This guide provides a step-by-step process to help you download, install and configure IBM Lotus Notes.
Software Guide
Stage 1 : - Steps to Download and Install IBM Lotus Notes on Windows PC
1 ) First, download the IBM Notes application from the following link: -
2 ) Create a folder in a location on your system where you want to store the IBM Lotus Notes data (e.g., user profiles, accounts).
3 ) Double-click and run the Lotus Notes setup file from the recently downloaded .exe file.
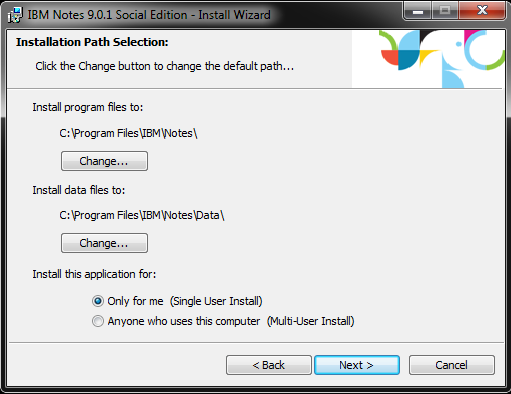
4 ) In the IBM Notes Setup Wizard, choose the account type based on your needs, and browse to the folder you created for storing your data.
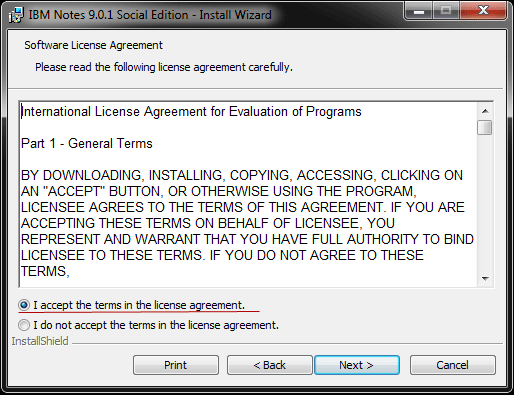
5 ) Click Next, then accept the license agreement by selecting I accept the terms in the license agreement and click Next.
6 ) Select the installation options that best fit your requirements and click Next.
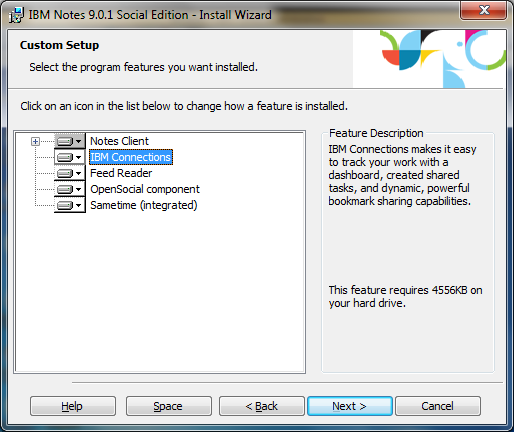
7 ) In the Custom Setup window, choose the option for IBM Connections (if needed) and continue with Next.
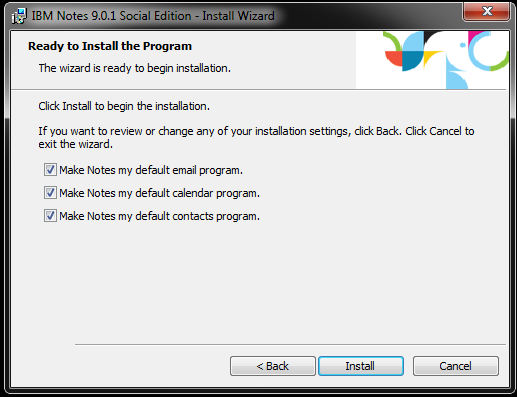
8 ) Review your setup options, then click Install to begin the installation process.
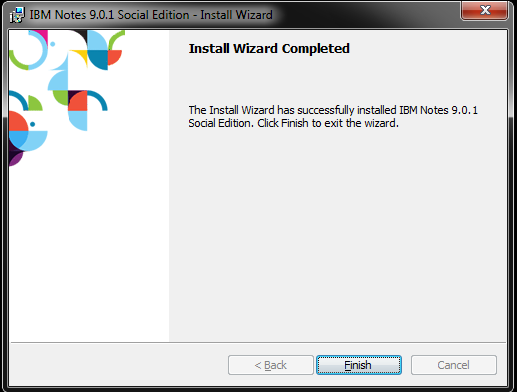
9 ) Once installation is complete, click Finish to exit the setup wizard.
Stage 2: - How to Configure IBM Lotus Notes (Add Email Account)?
1 ) Launch IBM Notes application.
2 ) In the "Welcome Window", click Next to proceed.
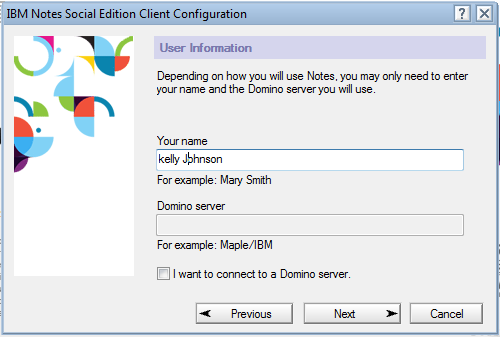
3 ) Enter your name and the Domino server name (this information should be provided by your IT administrator) and click on Next.
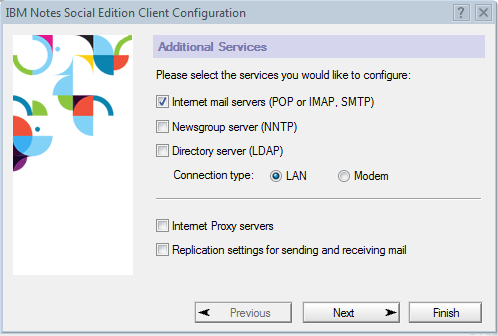
4 ) In the Additional Services section choose the services you want to enable.
From this section we have selected Internet Mail Servers (POP or IMAP, SMTP), adjust any necessary settings, and then click Next.
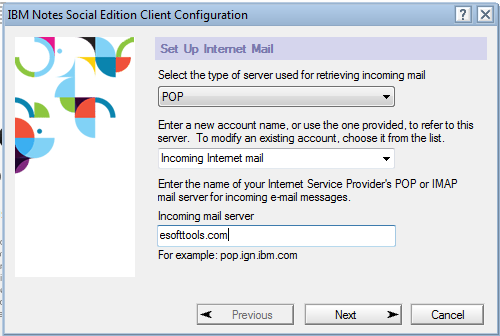
5 ) In the Setup Internet Mail window, provide the details for your incoming mail server (IMAP or POP settings), then click Next.
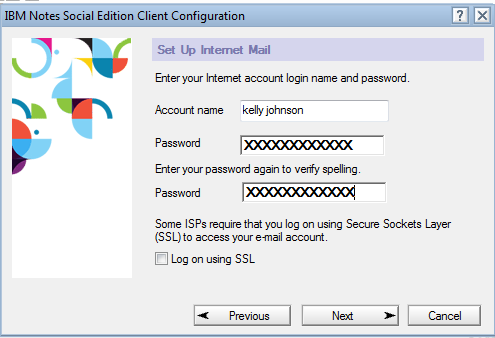
6 ) Enter your account login details (username and password) for the email account and click Next.
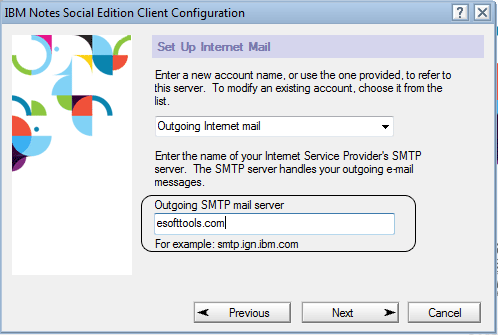
7 ) In the Outgoing SMTP Mail Server section, enter the server details for sending emails and click Next.
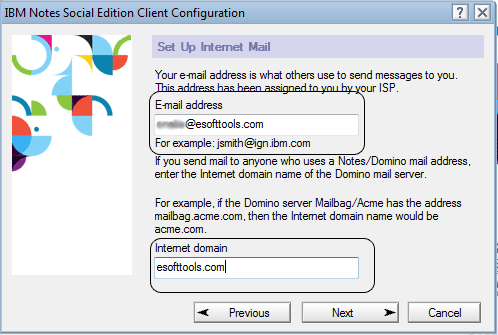
8 ) Provide your email address and Internet domain (e.g., yourcompany.com) and click Next.
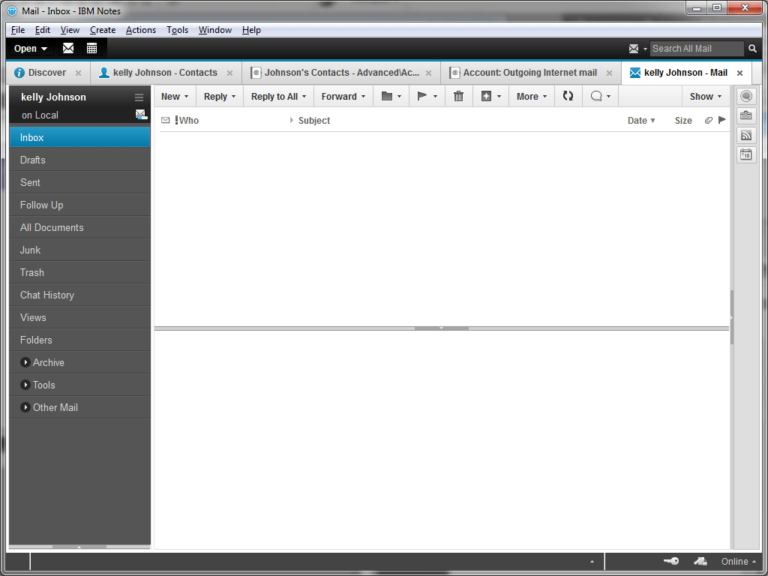
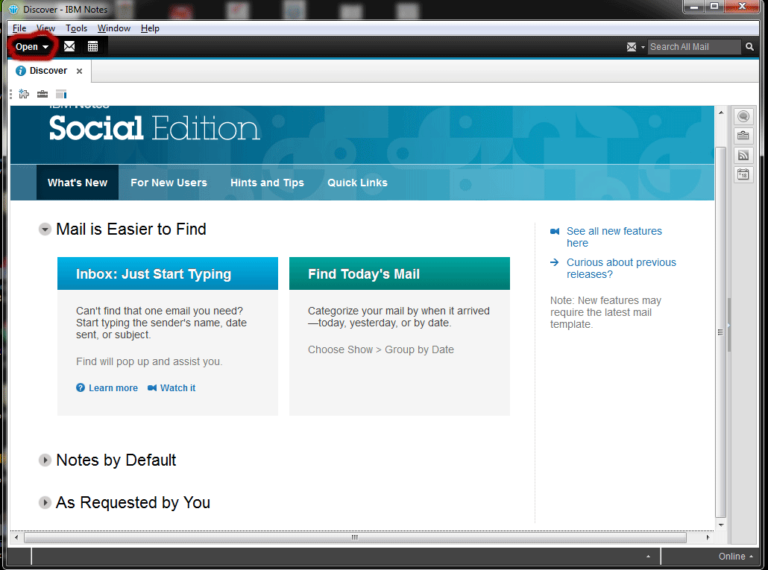
9 ) Once all settings are configured, click Open on the main screen to proceed.
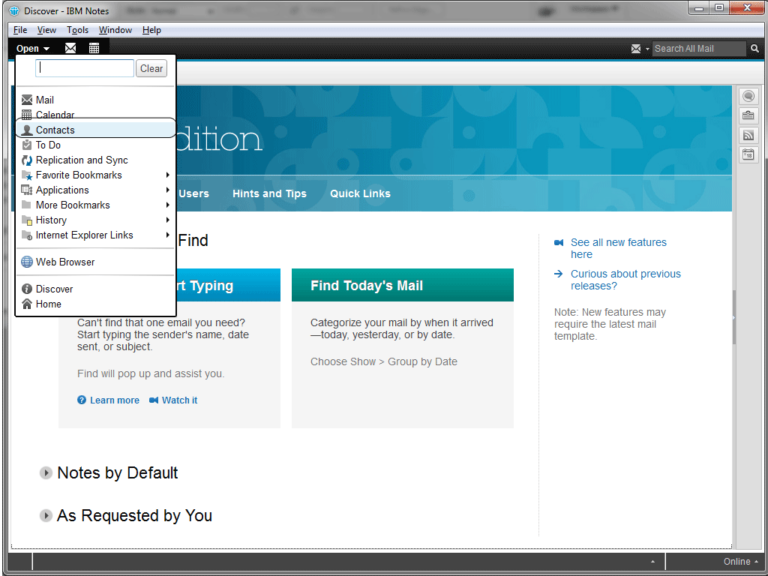
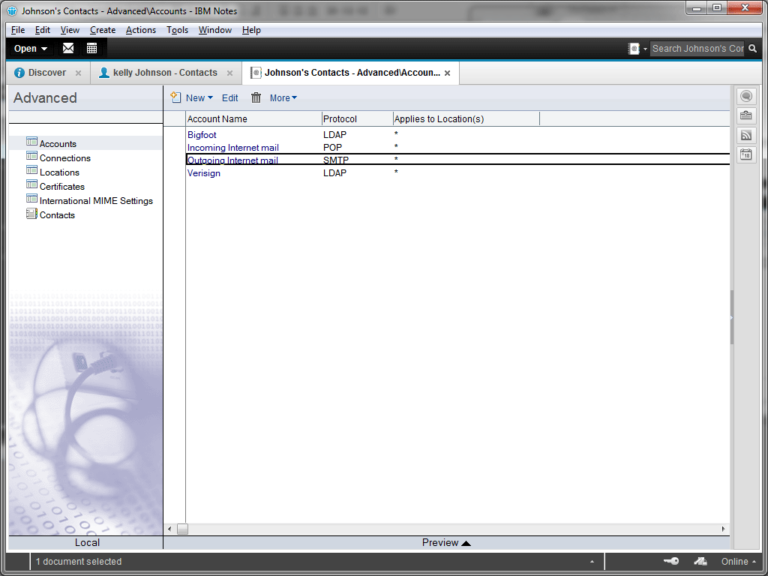
10 ) Select the Contacts option from the list to sync or configure your contacts.
11 ) Click the Advanced option and double-click on Outgoing Internet Mail to adjust the mail sending settings.
12 ) Select Edit Account to enter your account credentials and save them.
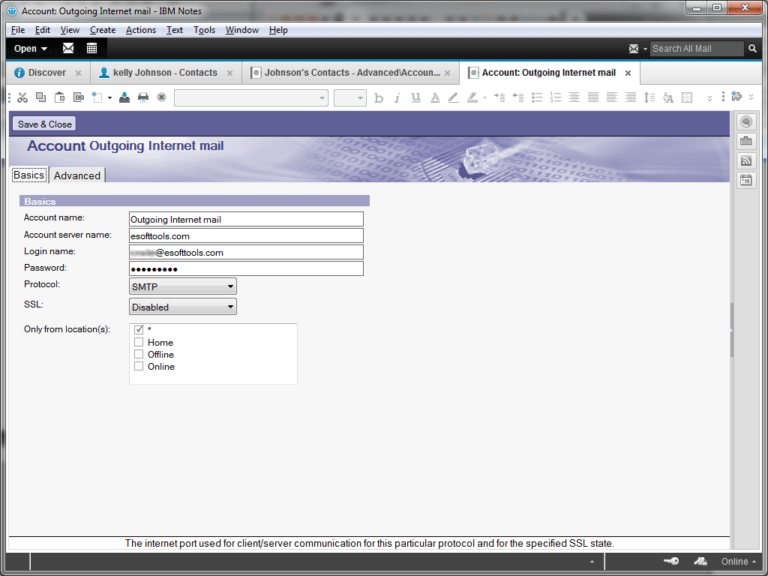
13 ) After making the necessary adjustments, click Save & Close.
14 ) Once again, click Open and then select Choose Mail to start managing your emails. All the configured emails should now be visible.